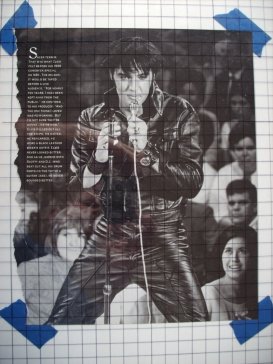
Clear Plastic Drawing Grids
Drawing Grids for your reference photos is an important step in the Grid-Drawing Method.
|
Let's go over the ways to prepare your reference photos for the grid method. Creating drawing grids for a reference photo can be done one of three ways...
|
Drawing a Grid Directly on a Photo
An advantage to drawing grids directly on your reference photo is that there is no chance that the grid will move on you while moving your reference around.
Using the other methods discussed below will require taping things down. If the tape isn't applied properly, things could come loose and cause you some major headaches when you try to align things up again.
This is how to do it.
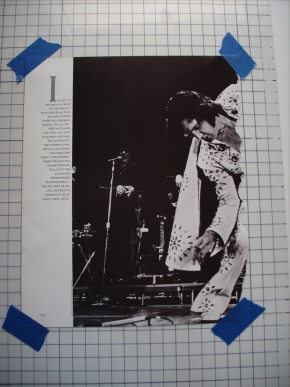
Place the reference photo on your drawing surface and tape it down at all four corners.
Using a measuring tool, go along the top, bottom, right and left sides and mark the photo with dots, spaced apart at whatever distance apart that you need. Very similar to what you do when creating a grid on you drawing paper.
The space between the dots will be determined by whether or not you are enlarging, or reducing the image, and by how much. It's then a matter of connecting the dots to create your grid.
To illustrate this lets say you have a small photo that you want to draw at an enlarged size, say by 50%.
The grid-squares on the reference photo might be ½ inch, while the grid-squares on the drawing paper will be 1 inch square. To reduce the photo, simply reverse the grid sizes.
You can use metric units if you like, as long as your consistent.
However, don't use this method if the photos you're using are of value to you or someone else, you wouldn't want to ruin them by drawing grids onto them.
Making Drawing Grids
Using Report-Cover/Sheet Protectors
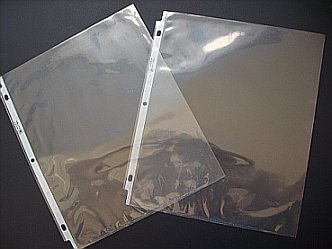
Sheet Protectors or report-covers, are used by businesses to keep documents neat-and-tidy.
I used them in college when handing in written assignments.
They come in packages and in various thicknesses.
Some open like a book, while others have an opening at the top, allowing the photo to be slid into it.
You'll usually find them where business supplies are sold.
You will only be able to use a reference photo that is the same size, or smaller than the report cover.
If your reference is smaller than the cover, you might want to secure it with a binder clip to help keep the photo from sliding around.
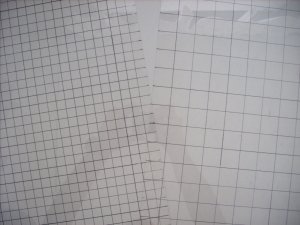
Preparing the cover sheets is just a matter of drawing grids over them with a black, thin-line permanent marker.
Draw whatever size grid you need. I have one with a 1 inch, a ½ inch, and another with a 1/4 inch grid. I wouldn't go bigger than 1 inch.
You might find that the black grid-lines will be hard to see against a dark background.
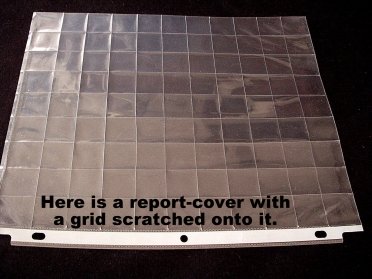
To solve this problem you'll need to use something with a sharp point, such as the point of a metal drafting compass, or scratch awl to create your grid.
Place the report cover on a piece of cardboard or similar material to safeguard whatever surface you might have the report cover laying on.
Gently etch the lines of your grid into the surface of the report cover with the sharp, pointed tool of your choice.
Whatever you use to etch the grid onto the report cover, make sure it doesn't allow cutting of the plastic. You want the tool to "scratch" the surface, leaving a kind of white grid on the plastic.
Using a Sheet of Clear Plastic
Drawing grids on a sheet of plastic is done in much the same way as in the above methods, using a thin-line marker, or a sharp pointed tool to scratch on a grid.
A sheet of plastic is used when the reference is too large for a sheet protector.
Obviously you'll want the plastic to be clear, and at least 2'x2' in size.
You can purchase large sheets of plastic at the large hardware/home improvement stores. I wouldn't go with the really pricey plastic, it really isn't necessary.
If you can find a company that specializes in plastics, ask them if you can look at their remnants, or scraps. You can get some good deals by taking those scraps off their hands.
Don't get plastic that is too thick. It's heavy, and hard to maneuver around.
First...
Draw, or etch a graph onto the plastic sheet.Next...
Tape your reference photo onto your drawing table.Finally...
Tape the sheet of plastic over your reference, using the edges of the photo and the grid-lines to square them up together.Another Method...
If you are using a table that needs to be cleared-off for other uses, such as a dinner table, then the following method will need to be used.Rather than taping the reference photo to the table, tape it directly onto the back-side of the plastic.
|
Back-side |
Front-side |
You'll square-up the photo by lining-up the edges of the photo along the grid-lines on the plastic.
Tape the photo on all 4 corners (you are using art tape, right?).
Now your reference photo is portable!
If you need for me to clarify anything, just contact me and I can even create a video on drawing grids just for you.
Subscribe to my Newsletter
